Adding a New View
Select the Application you would like to add a View to. Find the "Views" drop down menu. Next to the appropriate table, click +
Once you select the table you'd like to add a View to, it will take you into the View Creator. Here you have the ability to edit:
-
View Name and Description- Above the Fields, Filters, and Format tabs, you will find two fields. The left field allows you to choose the name of the View and the right field allows you to include a description of the View.
- Fields- What fields you would like to show in a View? 'Available Fields' shows fields that are not currently in the View, but can be added. 'Included Fields' shows the fields which you will see in the View. You can also select all fields by using the 'Toggle All' button. After one or more fields have been selected, a 'Remove' or 'Add' button will appear at the bottom of the window. This button simply moves the View to the opposite status. Note: By default, all field are included.
- Filters- Filters allow you to customize a View so that only database records meeting certain criteria appear in a View. In other words, each filter is a piece of logic related to a specific field’s value (greater than, equal to, not blank, etc.) that ensures only qualifying records make it into the View. (See "How to Create a Filter")
-
Format- This section allows you to customize how your information is presented. You can group data, perform calculations, change the order of fields, add labels to fields, or change row height settings. In the example below, Employees are grouped by Department, showing the number of Employees in each Department. Note: If you choose 0 for row height, information will not show in the View.
If you wish to see your data plotted on a Chart, click on the chart icon shown below. For more information regarding Charts, please see our article on "How to Create a Chart."
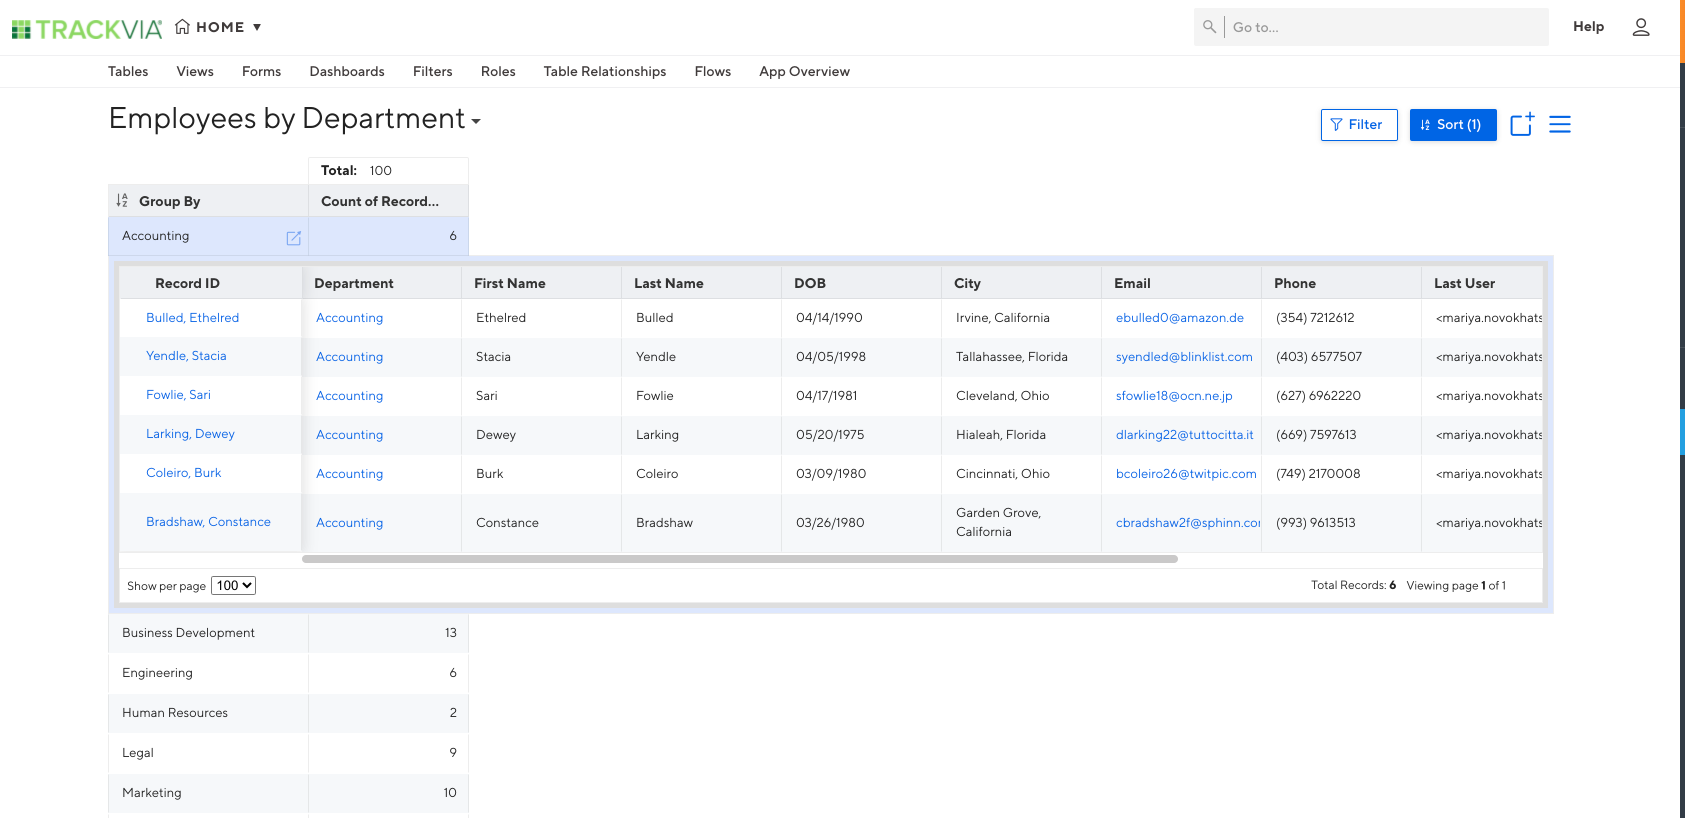
Once a View has been created, you will need to click "Save & Finish" at the bottom. This will automatically direct you to the View you've created. At the top of the View, you can see what Table and View you currently have shown. Below is the View created by grouping by Department and counting Employees. Notice that by default, each group is collapsed. You can expand each group to View the associated records.
*Note that if you group by a field that has blank values, and perform a count on that same field, a group will appear that shows a 0 record count. However, this group may still contain records. You can view the records by expanding the group (below).

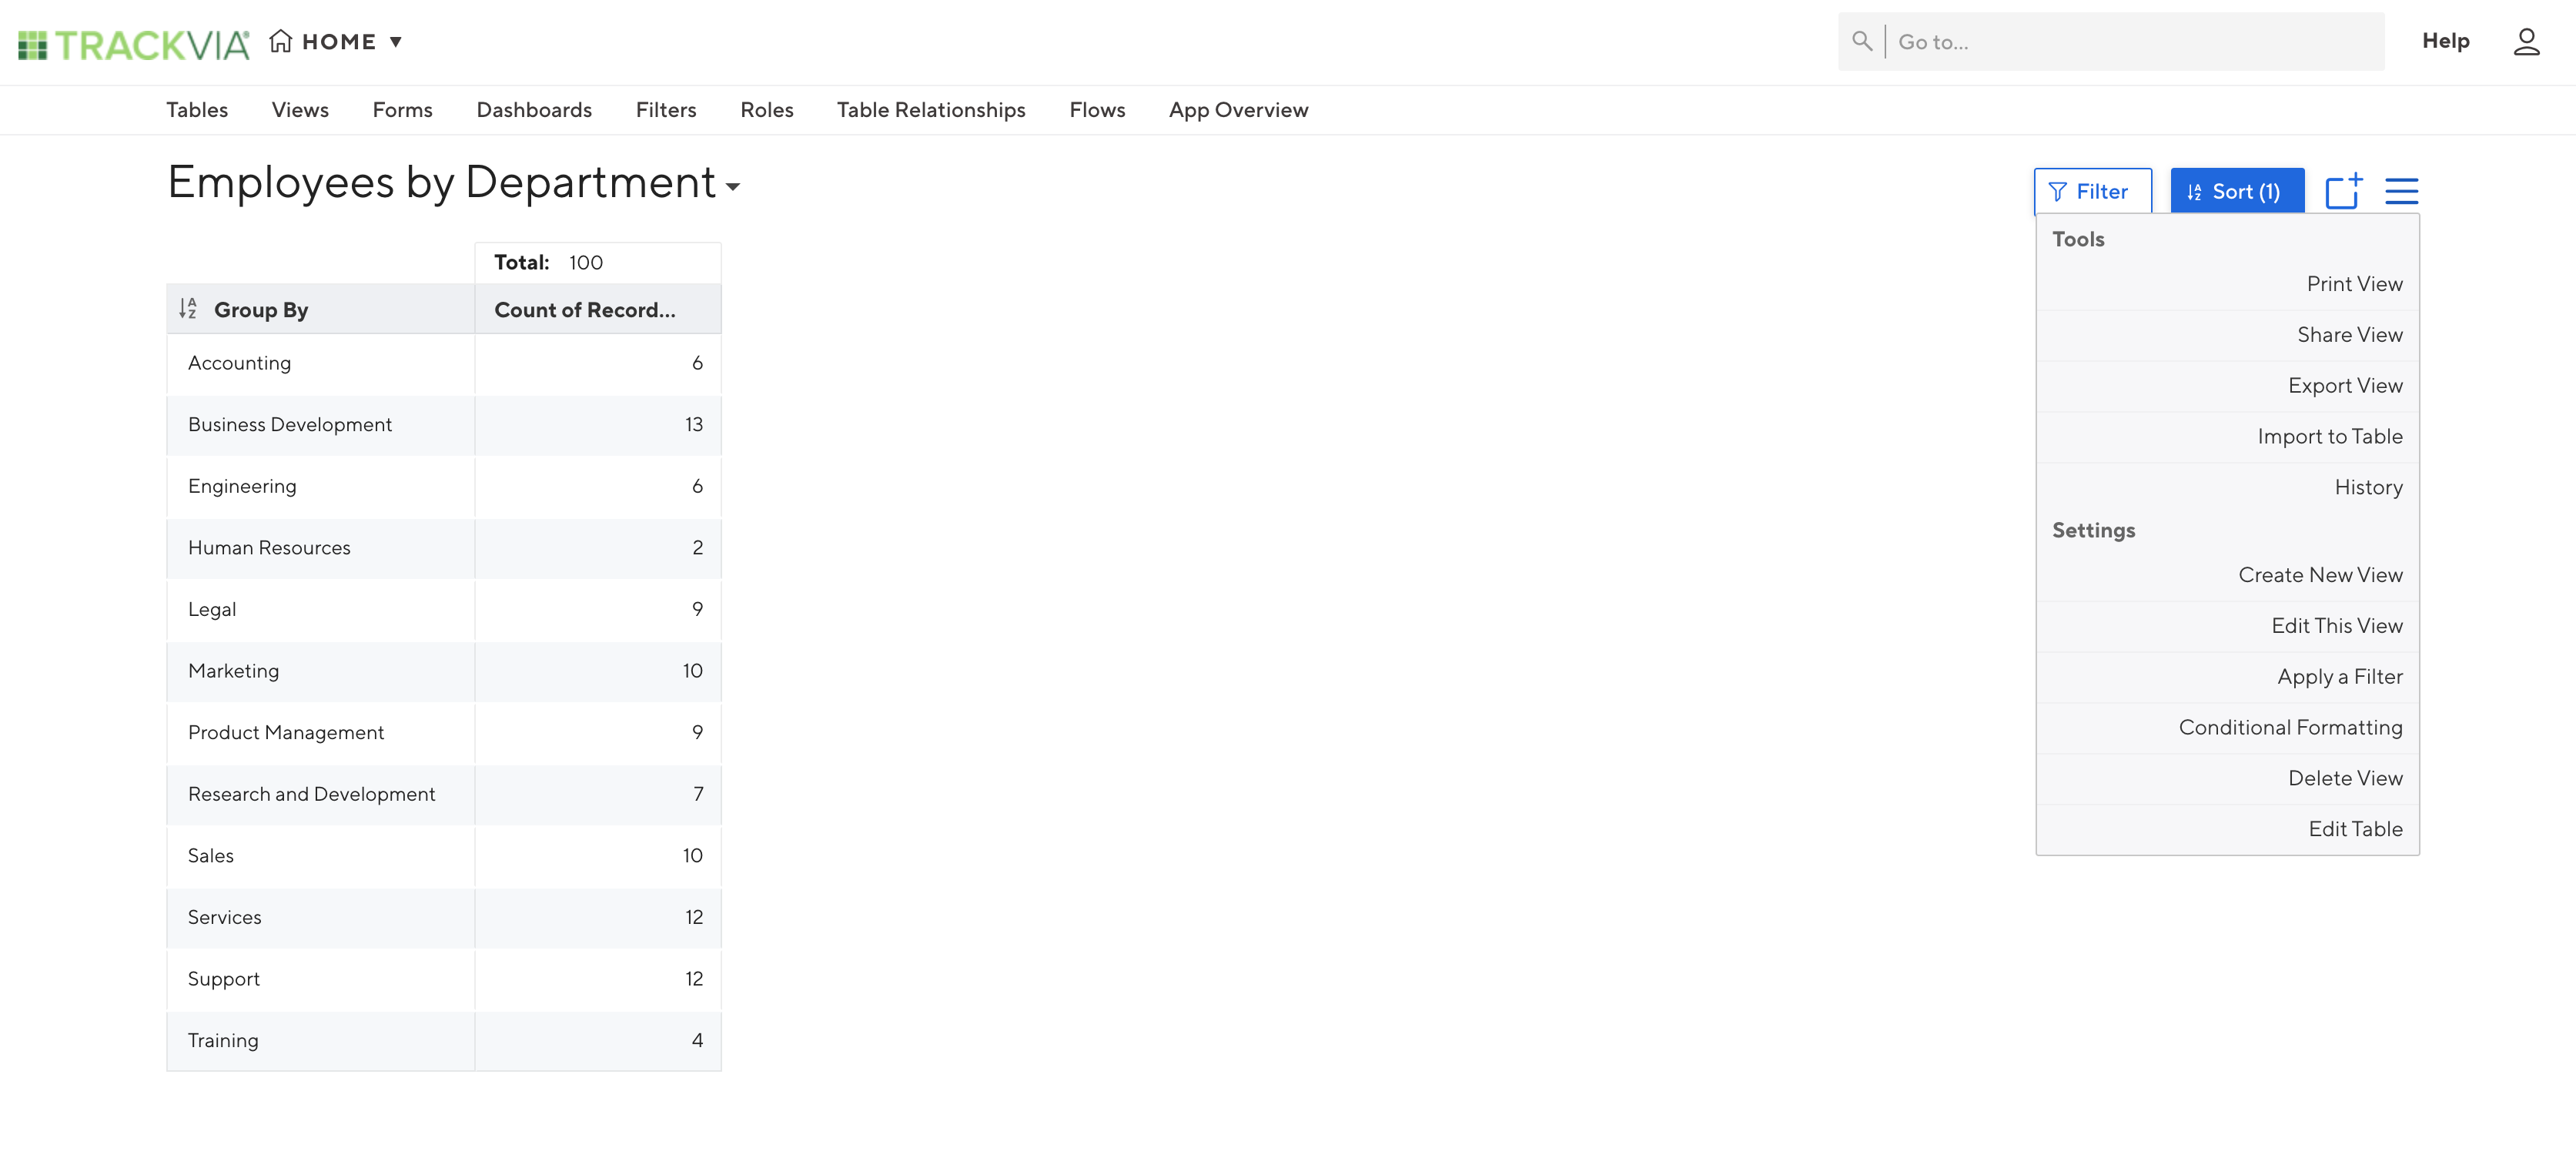
You can always edit or change an existing View by clicking on the Menu icon at the top right of the View. Additionally, this image shows the Summary View collapse.

Comments
0 comments
Please sign in to leave a comment.