How to Import to an Existing Table
Step 1:
Go to your Table, click on the menu on the top right-hand corner, and select "Import to Table".
Step 2: Upload your spreadsheet. (See How to Prepare a Spreadsheet for Importing)
Step 3: Confirm the Import Options

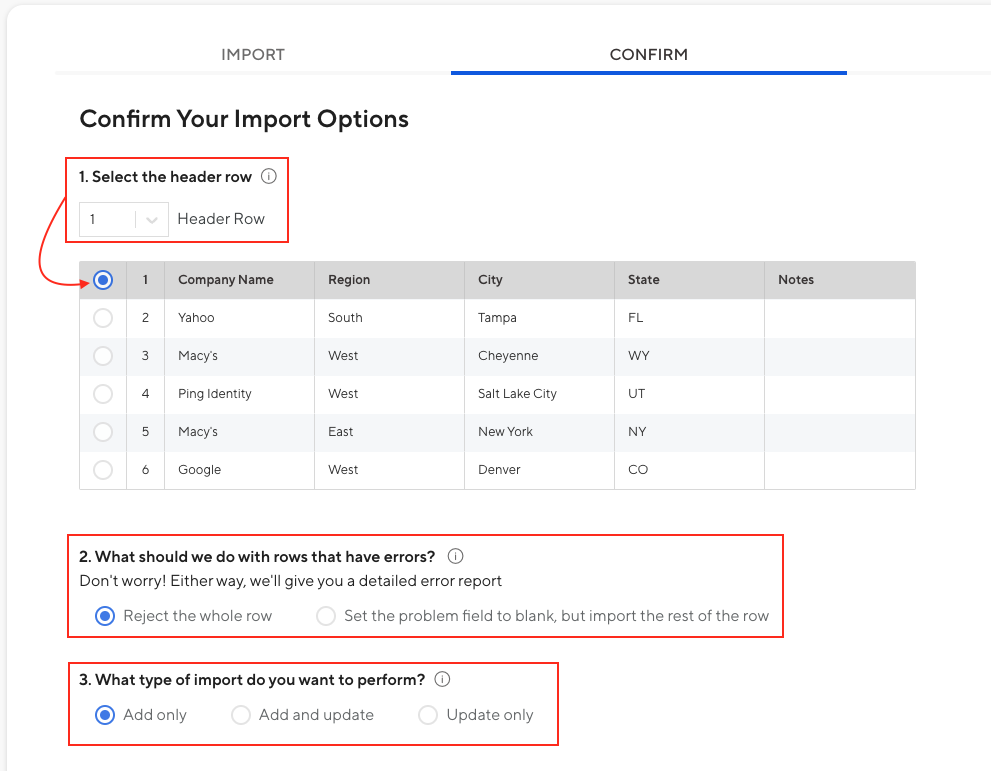
- Confirm your header row - tell us which row in your file has your field titles.
- Tell us how we should handle errors.
- Reject the whole row - Choose this if you want to correct the errors and re-import the whole row.
- Set the problem field to blank, but import the rest of the row - Choose this if a blank field value is okay or if you want to correct the error directly in TrackVia.
- Select the type of import you wish to perform.
- Add Only: Choose this if you just want to add new records.
- Add and Update: Choose this option if you want to update existing records that match and add new records that do not match.
- Update Only: Choose this to update your existing records and discard records that do not match.
- If the table that you’re importing into has app scripts on it, you will see a 4th option to disable the app scripts for the imported records. This will only pertain to the records that are being imported, and not records that are added or updated manually. It will only apply to the current import that is being initiated. Disabling the app scripts will decrease the amount of time that it takes to import the data.
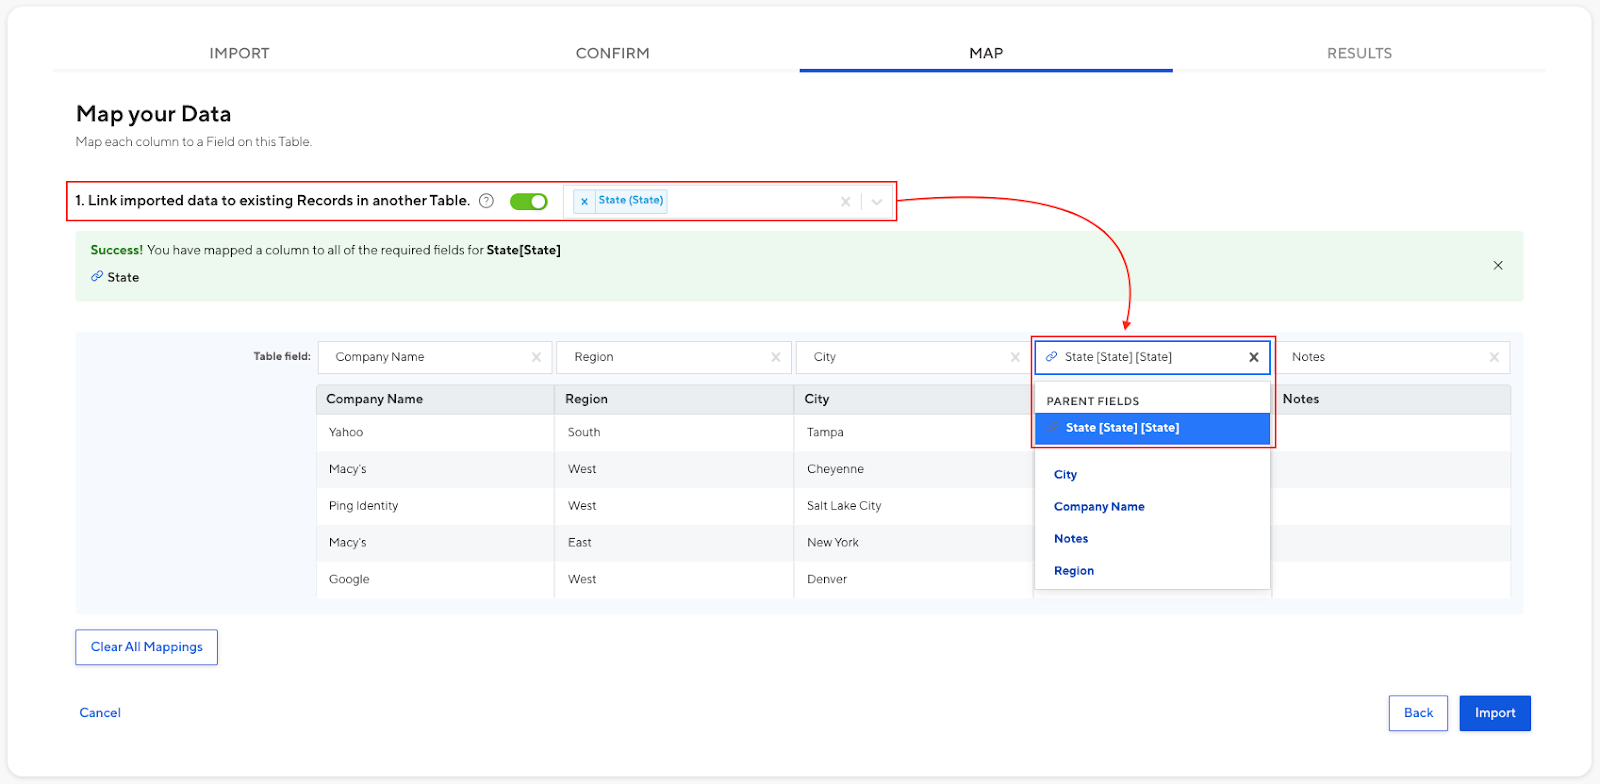
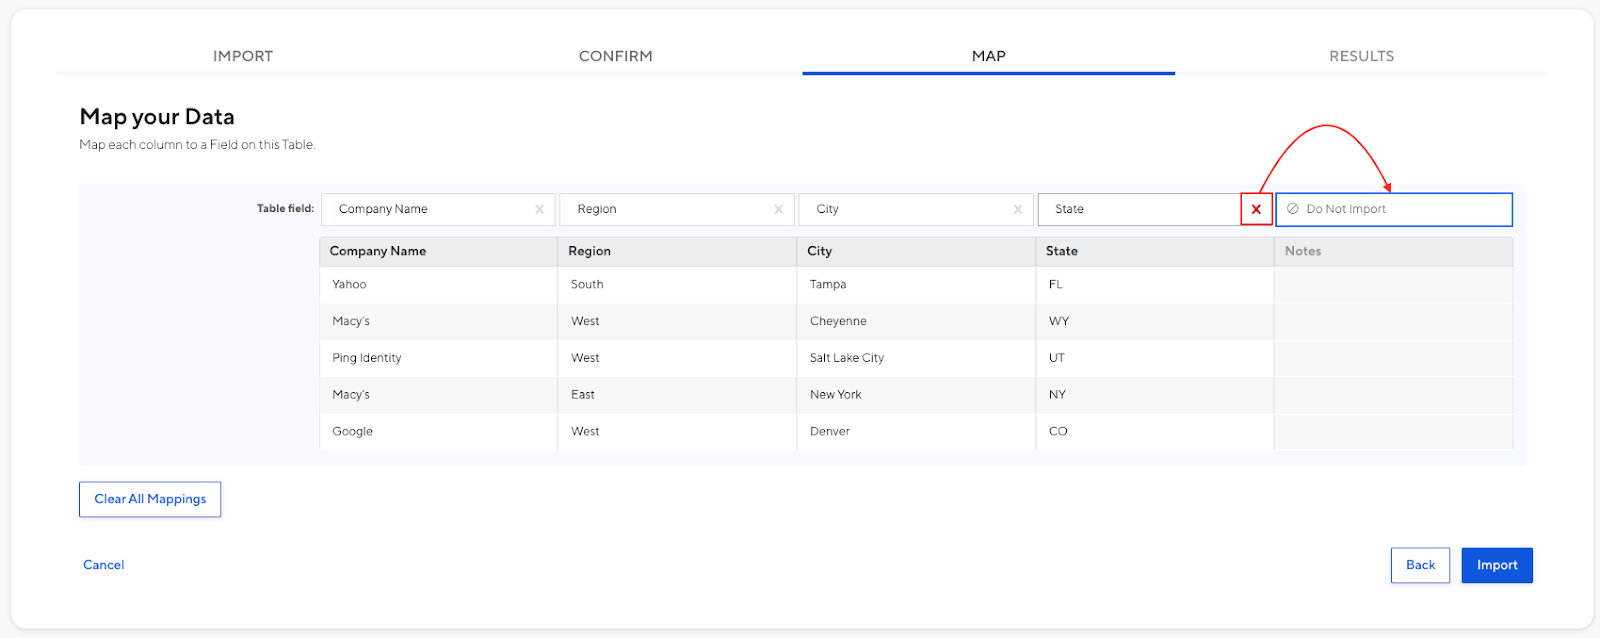
Step 4: Map Your Data
Link to a related table. The import can be linked to an existing table with this option. In order to link to a table, your import file must contain the components that make up the "Record ID" of the table you wish to link to. For mapping purposes, you will notice the related table contains brackets. Please refer to How to Prepare a Spreadsheet for Importing, to make sure you have all the components to link to the Parent records.
Map your fields. Here, you can map the columns in your spreadsheet to the field names on your existing table. Calculated fields will default to "Do Not Import", as they will populate once the import completes. If you want to manually select a column to "Do Not Import", click the red "X" on the column.
Step 5: Click next for the import to begin. Once the import completes, you will receive an email with the results.
Related Import Help Articles
How to Prepare a Spreadsheet for Importing
How to Import a New Table
Comments
0 comments
Please sign in to leave a comment.